Normally, Windows is installed using optical media like DVDs and CDs but there are times when it is not possible to boot into the windows setup using disks probably because your DVD drive is not working or, if you are using one of those ultra-portable laptops, it is not there at all.
 To overcome this problem, one can either use external disks and install windows normally or create a bootable pen drive (flash drive) to install Windows on the go. In this tutorial, we will discuss about the latter and learn how can we create a bootable USB drive for installing Windows XP, Windows Vista or Windows 7. Moreover, as installing Windows from a CD/ DVD is much slower than from a flash drive, such an installation will also save time.
This article assumes that your computer has a mother board which supports booting from USB drives. Most modern laptops and desktops support it. If you have bought your computer in the past 5 years, then you do not need to worry about this.
Installation Requirements
This article assumes that your computer has a mother board which supports booting from USB drives. Most modern laptops and desktops support it. If you have bought your computer in the past 5 years, then you do not need to worry about this.
Installation Requirements
- An empty Flash drive with a storage capacity of 1GB for Windows XP and 3GB for Windows 7, Windows Vista and Windows Server 2008.
- Windows Installation Disk or Windows Installation files stored somewhere on your computer.
Steps to create a Bootable USB Flash Drive/ Pen Drive
- Download Win to Flash. The software is still in beta phase so it is possible that it has some bugs although I have personally faced none. The latest version of Win to Flash can be downloaded from Win to Flash website. To avoid this tutorial from getting outdated, I would advise to download the software from the former link.
- Extract the downloaded zip file to any folder on your desktop.
- Open the folder and run WintoFlash.exe by double clicking on it.
- Click Next, check I accept EULA, click Next and Next again. Wait for the software to load some ads, click Next and Next again.
- A welcome screen like one in the image below will show up.
- Click on the big green tick. The welcome screen will turn translucent and WinToFlash wizard will open.
- Click Next. On Windows File path entry, click Select button and select the location of your Windows disk, or the folder containing the Windows setup files and click OK.
- On USB Drive path entry, select your USB flash drive's location and click OK.
- Click Next button. In the dialog box, encircle I accepted the license agreement and click Continue.
- A warning message will be displayed saying that Formatting will erase all data on the disk. Click OK in the message.
- WintoFlash will show a Windows with a progress bar like one in the image below.
- After the progress bar reaches the end, press Next and then press Exit. A notification to update WintoFlash might be shown, click No just close to close it.
 |
| Win to Flash welcome screen |
 |
| Wizard showing the various version of Windows it supports |
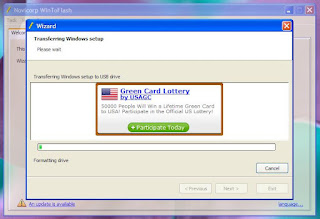 |
| Preparing a bootable Pen Drive |
That's it. You now have a bootable pendrive that can be used to install Windows.
This tutorial works on all versions of Windows including Windows 7, Windows Xp and Windows Vista.Install Windows from the bootable USB pen drive/ flash drive/ Thumb Drive
- Plugin your thumb drive.
- Start your computer. Go into BIOS setup by pressing the delete key. In the boot menu, select your flash drive as the first boot device. Save Settings and Restart your PC. (This step might be different for different computers. Check your system guide to know how to change the boot order in your PC.)
- Windows setup will load.
- Install Windows by following instructions on the Screen.
Also Read: How to virus-proof your PC?